

The API Nation beta is now live! Keller Williams has partnered with API Nation to provide a solution for syncing contacts between Command and other 3rd party systems like Dotloop, Follow Up Boss, Google/iCloud Contacts, and more. The process begins with a user purchasing an API Nation sync subscription from the KW Marketplace. Once that is done the user can start creating custom syncs for that specific system and begin bringing over to contacts into Command and vice versa.
To sync Dotloop contacts with Command using API Nation:
Access
1. Log in to https://agent.kw.com with your KW login credentials.
2. Click the Marketplace icon, ![]() , at the top of the page.
, at the top of the page.
 |
3. At the top right of the page, click My Apps.
 |
4. You will see a list of your active Marketplace subscriptions, click the KW Command and Dotloop API Nation app.
 |
|
If you have previously set up a Dotloop sync with Command: 1. Once you get to API Nation, click Apps, at the top of the page. 2. Find and select KW Command, from the apps list. 3. Scroll down and select Dotloop. 4. Scroll down and select Activate next to "Setup Wizard."
|

5. Choose the Dotloop account you want to sync with Command.
- If this is your first Dotloop contacts sync with Command, you will then be prompted to enter your Dotloop login credentials
- If you have already set up a Dotloop contacts sync with Command, you have the option of using the account you previously connected (the login credentials are saved in the system), or you can choose to sync with a totally different Dotloop account (you will then be prompted to enter your Dotloop login credentials).
 |
Review Initial Settings
Before you start syncing, there are some initial options to be aware of. The settings will generally determine what you want to sync. You will be able to pivot on any of these settings, in the next section, before you actually start syncing contacts.
1. First, you will see the KW Command account you are going to sync with Dotloop. The following settings have to do with the initial sync when pushing contacts from Command to Dotloop:
Sync All Contacts on First Run
- If you check this box - all of your Command contacts will sync to Dotloop. Once the initial sync is complete, API Nation will then look for new or updated contacts to sync going forward.
- If you leave this box unchecked - API Nation will only look for new or updated contacts going forward. It will not sync your existing Command database with Dotloop.
Do not overwrite information in KW Command fields. Only add information into blank fields.
- If you check this box - if a contact already exists in both systems, but has different information in matching fields, API Nation will not replace any existing information in Command. API Nation will only look for blank fields, in Command, to populate with Dotloop contacts data.
- If you leave this box unchecked - if a contact already exists in both systems, but has different information in matching fields, the information in Dotloop will replace the information in Command.

2. Next, you will see the Dotloop account you are going to sync with Command. The following settings have to do with the initial sync when pushing contacts from Dotloop to Command:
Profile
This drop-down determines exactly which Dotloop Profile will sync to Command. Within this drop-down list, you will see all of the existing Profiles you have set up in Dotloop:
- If nothing is selected - API Nation will sync contacts from your entire Dotloop account, regardless of which profile the contacts reside in.
- If you select a profile - API Nation will only sync contacts to/from that specific profile, and will not sync anything else.
Sync All People
- If you check this box - all of your Dotloop contacts will sync to Command. Once the initial sync is complete, API Nation will then look for new or updated contacts to sync going forward.
- If you leave this box unchecked - API Nation will only look for new or updated contacts going forward. It will not sync your existing Dotloop contact list with Command.
 |
3. Next you will see options which determine which direction(s) you want contacts to sync. Check the box for the syncs you want to create:
- If you check both boxes - the system will create two separate syncs in API Nation, one in each direction.
- If you only check one box - the system will only create one sync, in the direction you indicate.

4. At the bottom of the page, check the box labeled "I am not using any other contact syncs (Piesync, etc.)." Click Continue.
- We strongly recommend turning off any other integrations you have between these two applications to avoid duplicates and other unpredictable scenarios with integrations outside of API Nation.

Set Up and Initiate Syncs
Now we need to set up each sync that was created in the previous section. Ensure that you verify the settings and field mapping before activating the sync:
1. By default, you will land on the My Syncs page, in API Nation. Click Setup on the sync you want to configure.
|
If you set up two syncs (one in each direction) and left the (Do not overwrite information in Command field. Only add information into blank fields be purposeful about which sync you initiate first) checkbox unchecked, be very purposeful about which sync you configure first. Leaving that checkbox unchecked means the data from Dotloop will override the data from Command, in the case of duplicates. If the information in Dotloop is more reliable than the information in Command, and you want that information to sync to Command, set up the Dotloop to KW Command sync first. |
 |
2. In the sync header, Ignore the Activate Sync button, at the top of the page, for the time being. Click the title of the sync to make any edits. Keep in mind, you might create several syncs for the same app, so be purposeful with the sync title.
 |
3. In this first section, you will see the initial settings (specific to the sync you are looking at) that we detailed in the previous section above. Here, you are able to make any changes you need, before actually starting the sync.
 |
Filters
1. In the filters section, you can set rules around which contacts you want to sync or not sync. Select a field (these will vary depending on the app you are syncing), then select a qualifying statement, and select a value (if the qualifying statement needs a value). In the GIF below, we give two possible examples of this, though there are many strategies you can use with these filters:
- Primary Phone (field), is not empty (qualifying statement) - if a contact does not have a primary phone number, it will not sync.
- Tags (field), equals (qualifying statement), Austin Buyers (value) - only sync contacts that have the Austin Buyers tag applied. The Tags filter is only available when syncing from Command to Dotloop.
 |
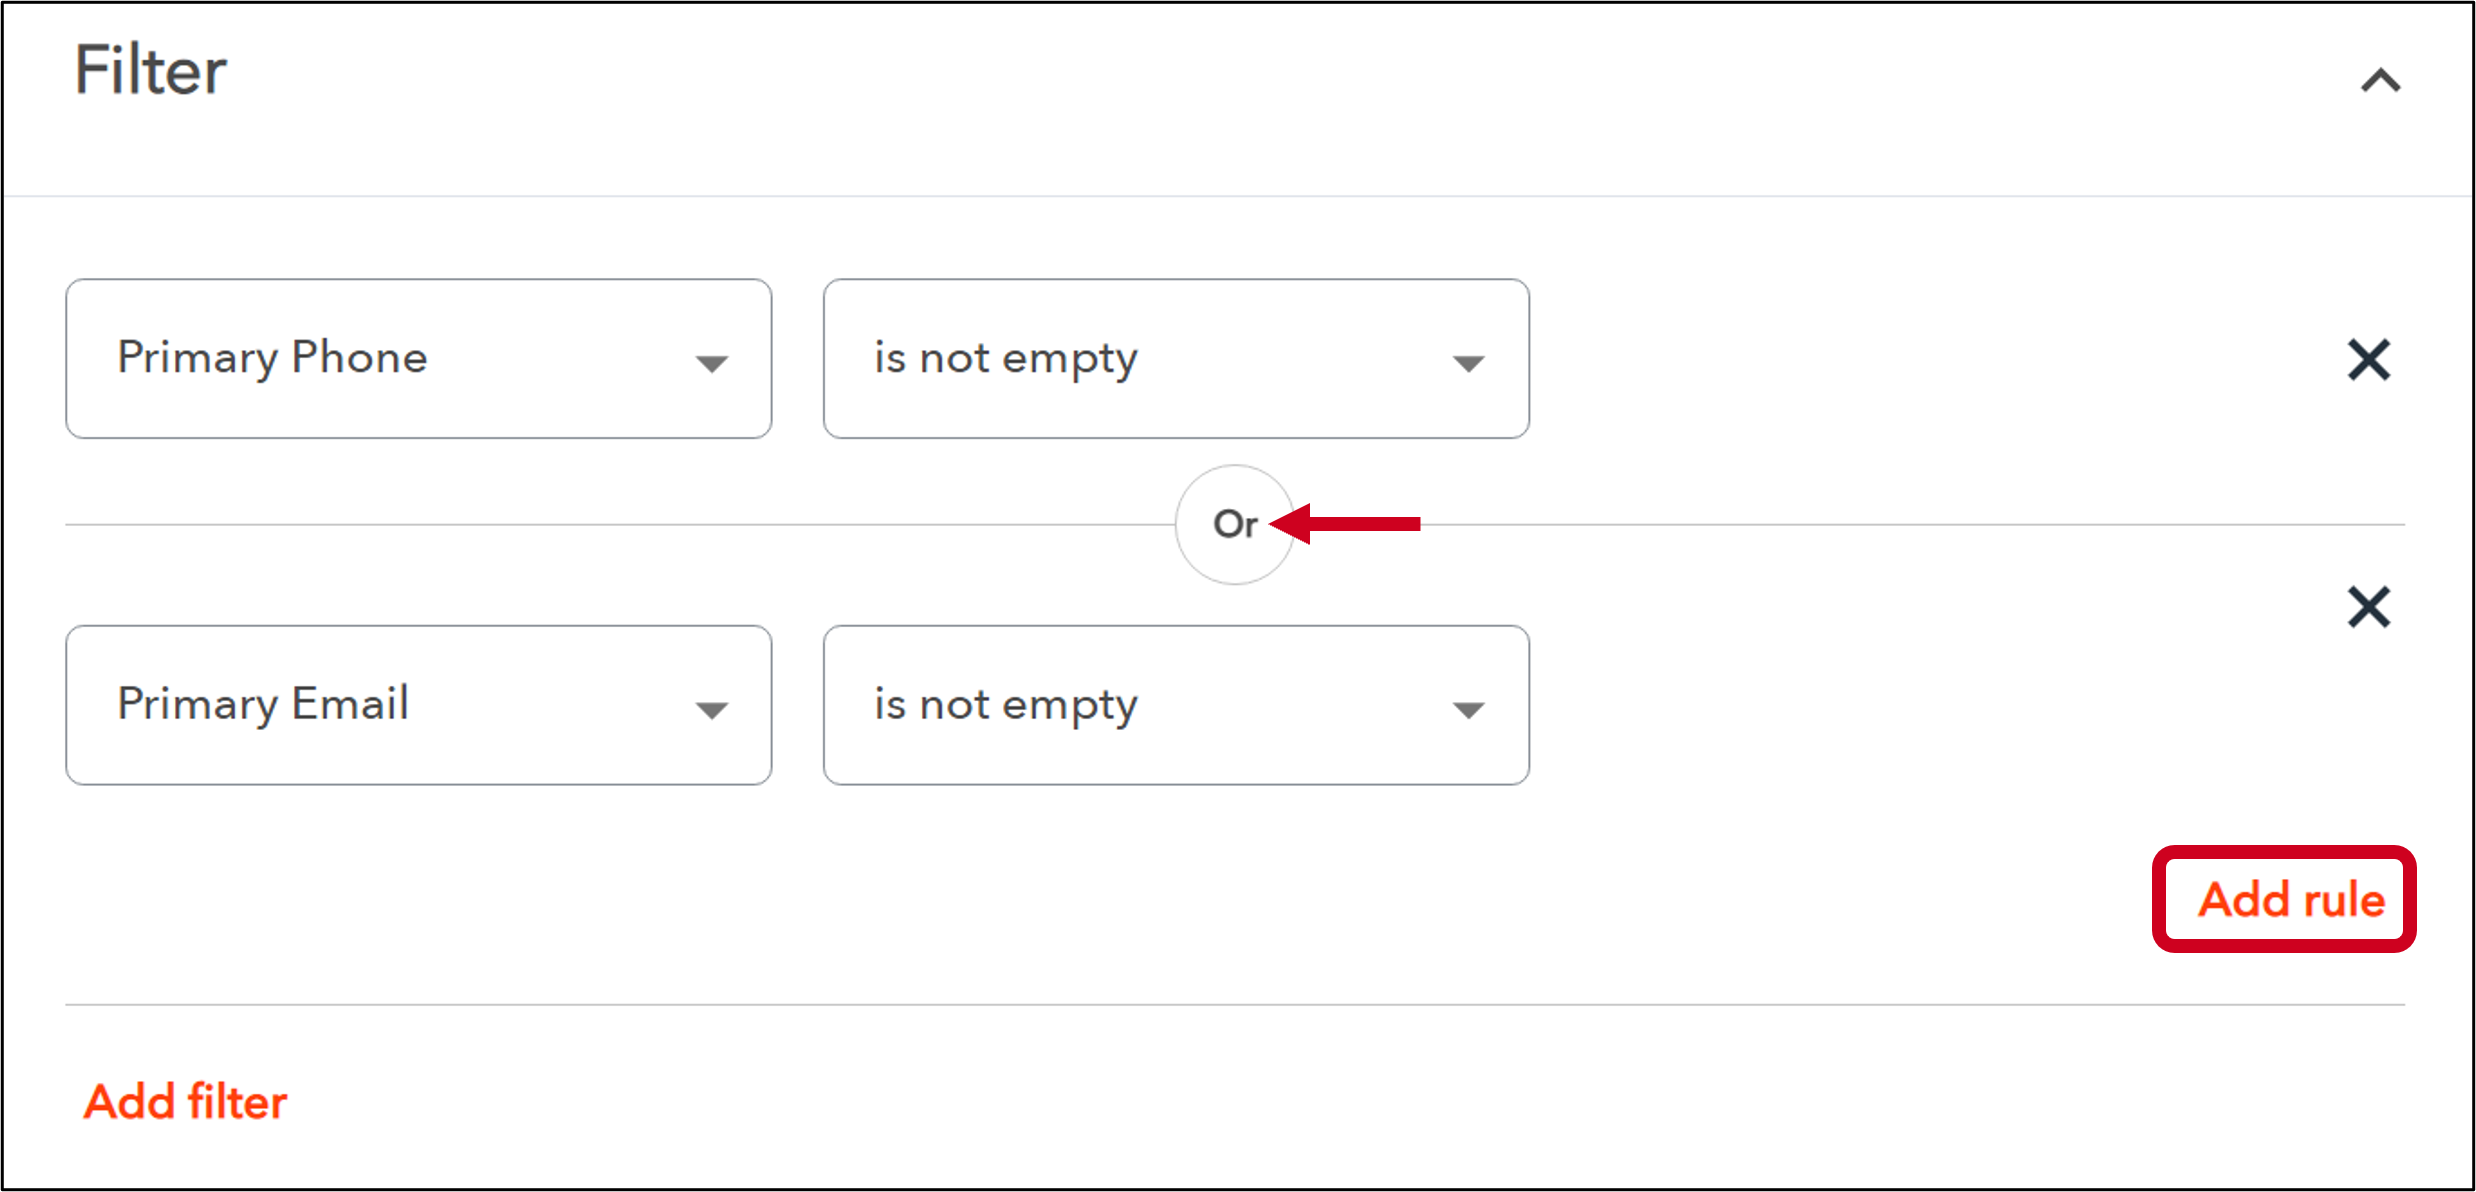
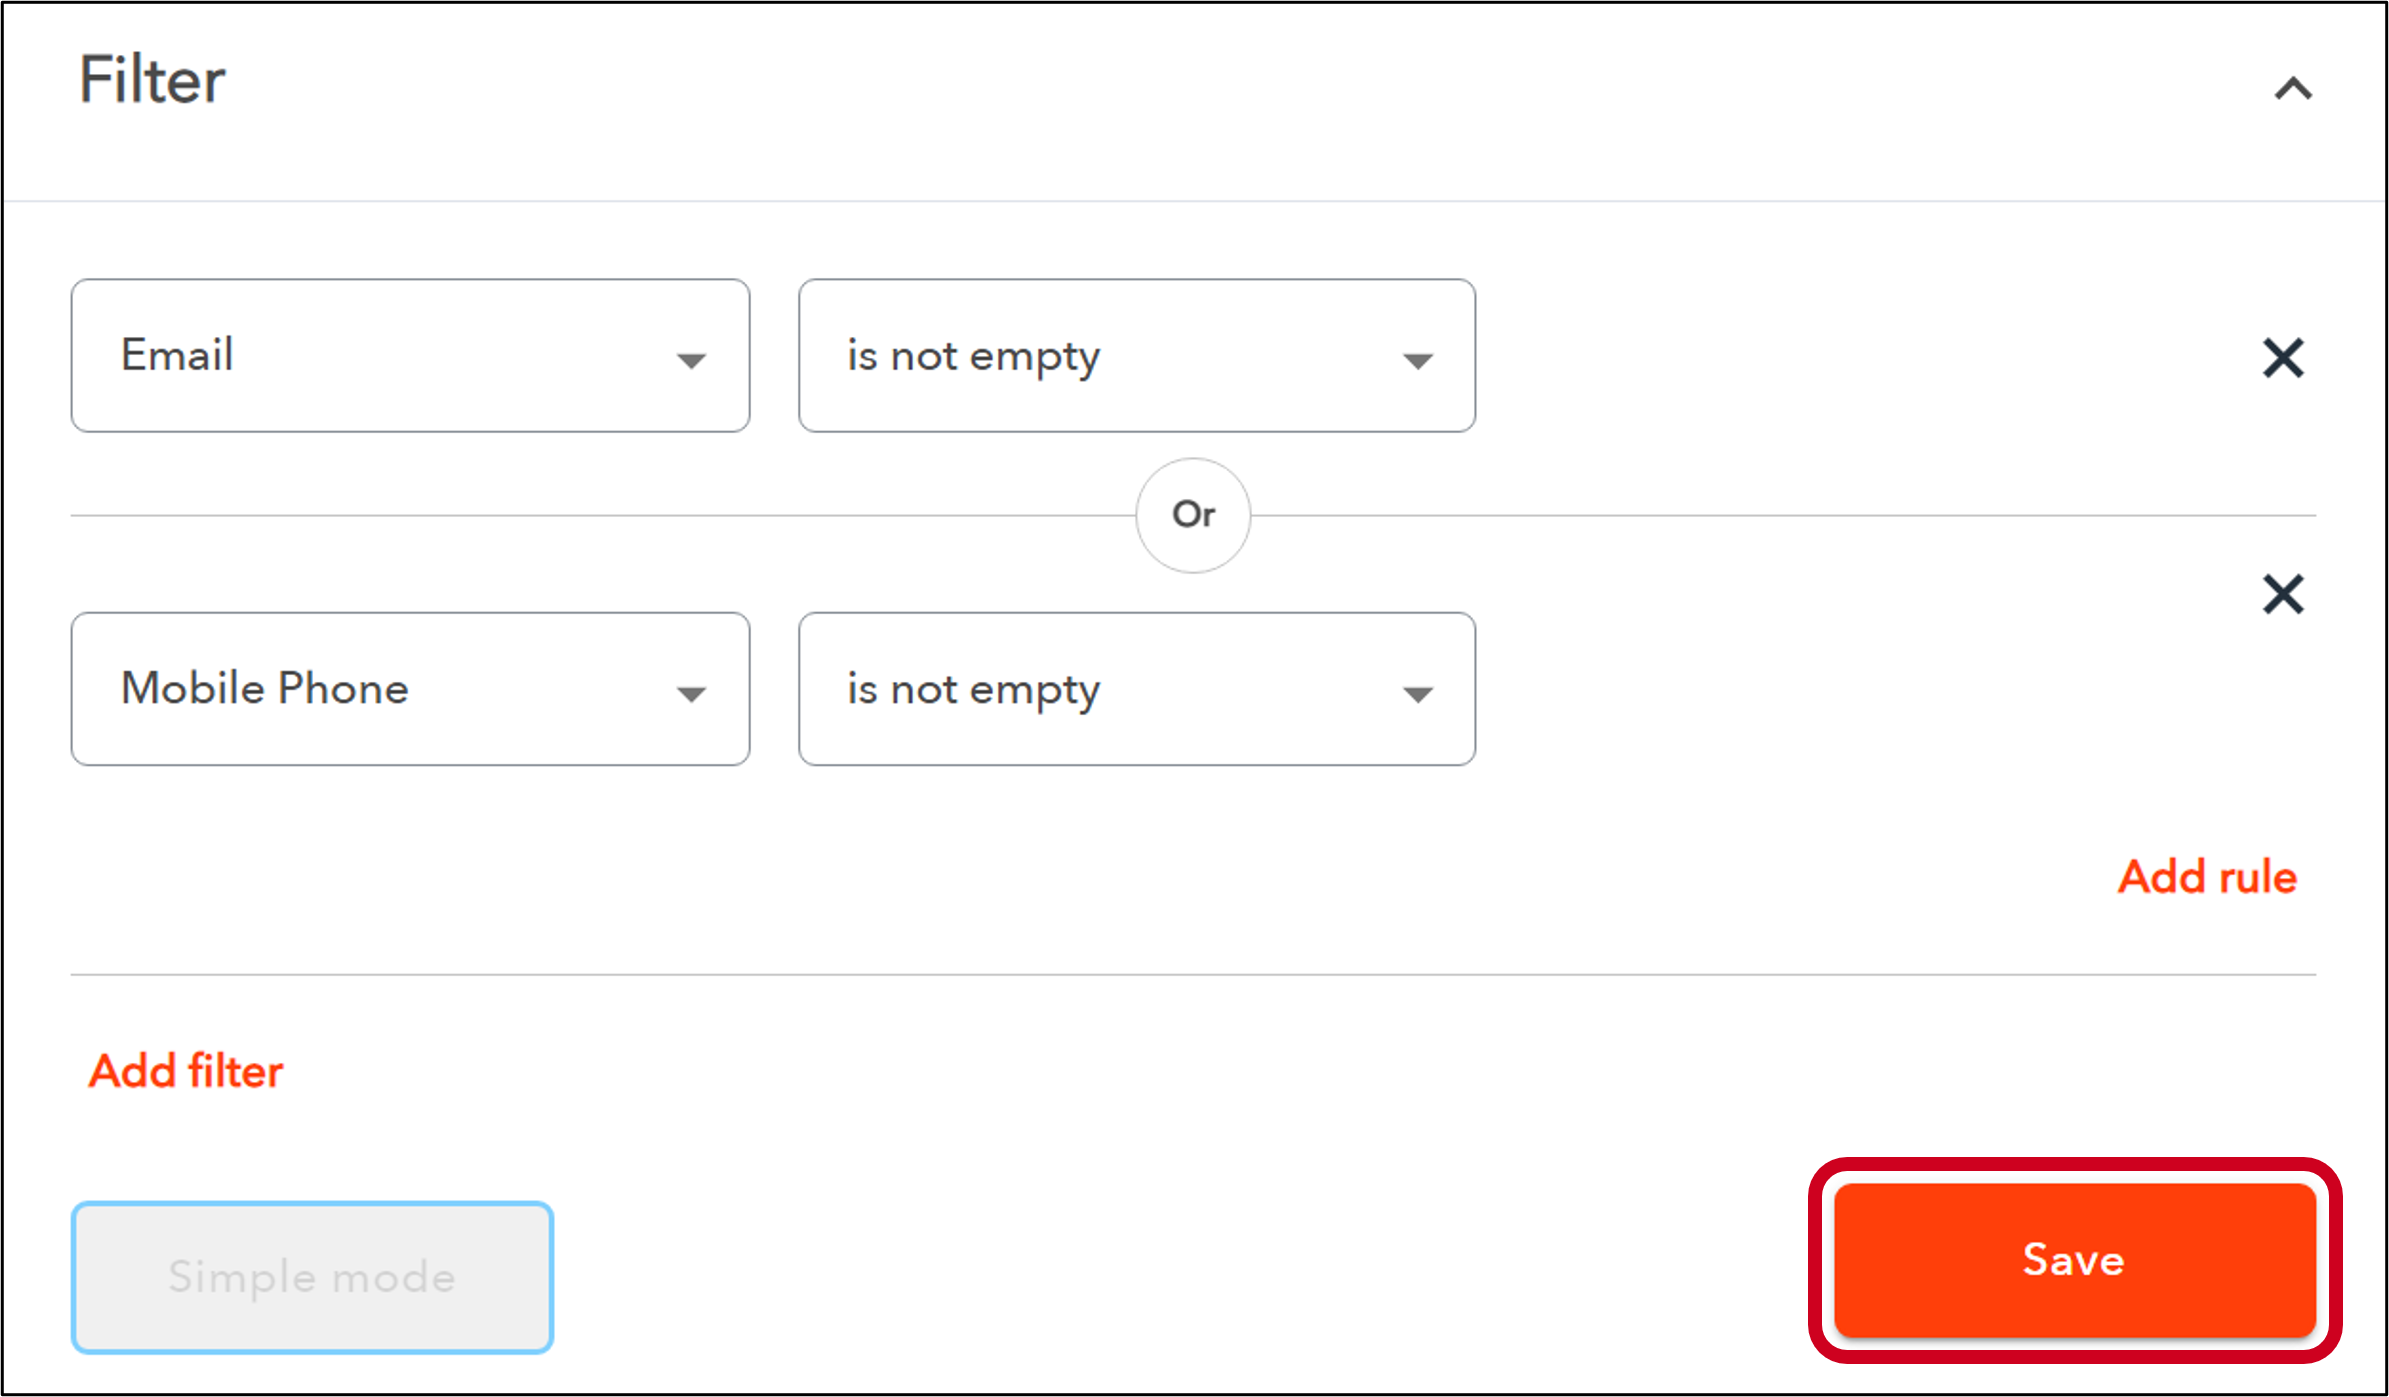
2. Click Advanced Mode to add additional filters. Once clicked, you will see two options for adding additional filters:
Add Rule - this creates an "or" rule. Each filter creates a limit on what will actually sync. Adding an "or" rule opens up the criteria a little and creates a situation where more contacts will sync. In the screenshot below, the original filter limited the contacts to be synced to those that have a primary phone number. This additional "or" rule says the contact must have a primary phone number or a primary email address, in order to sync.
 |
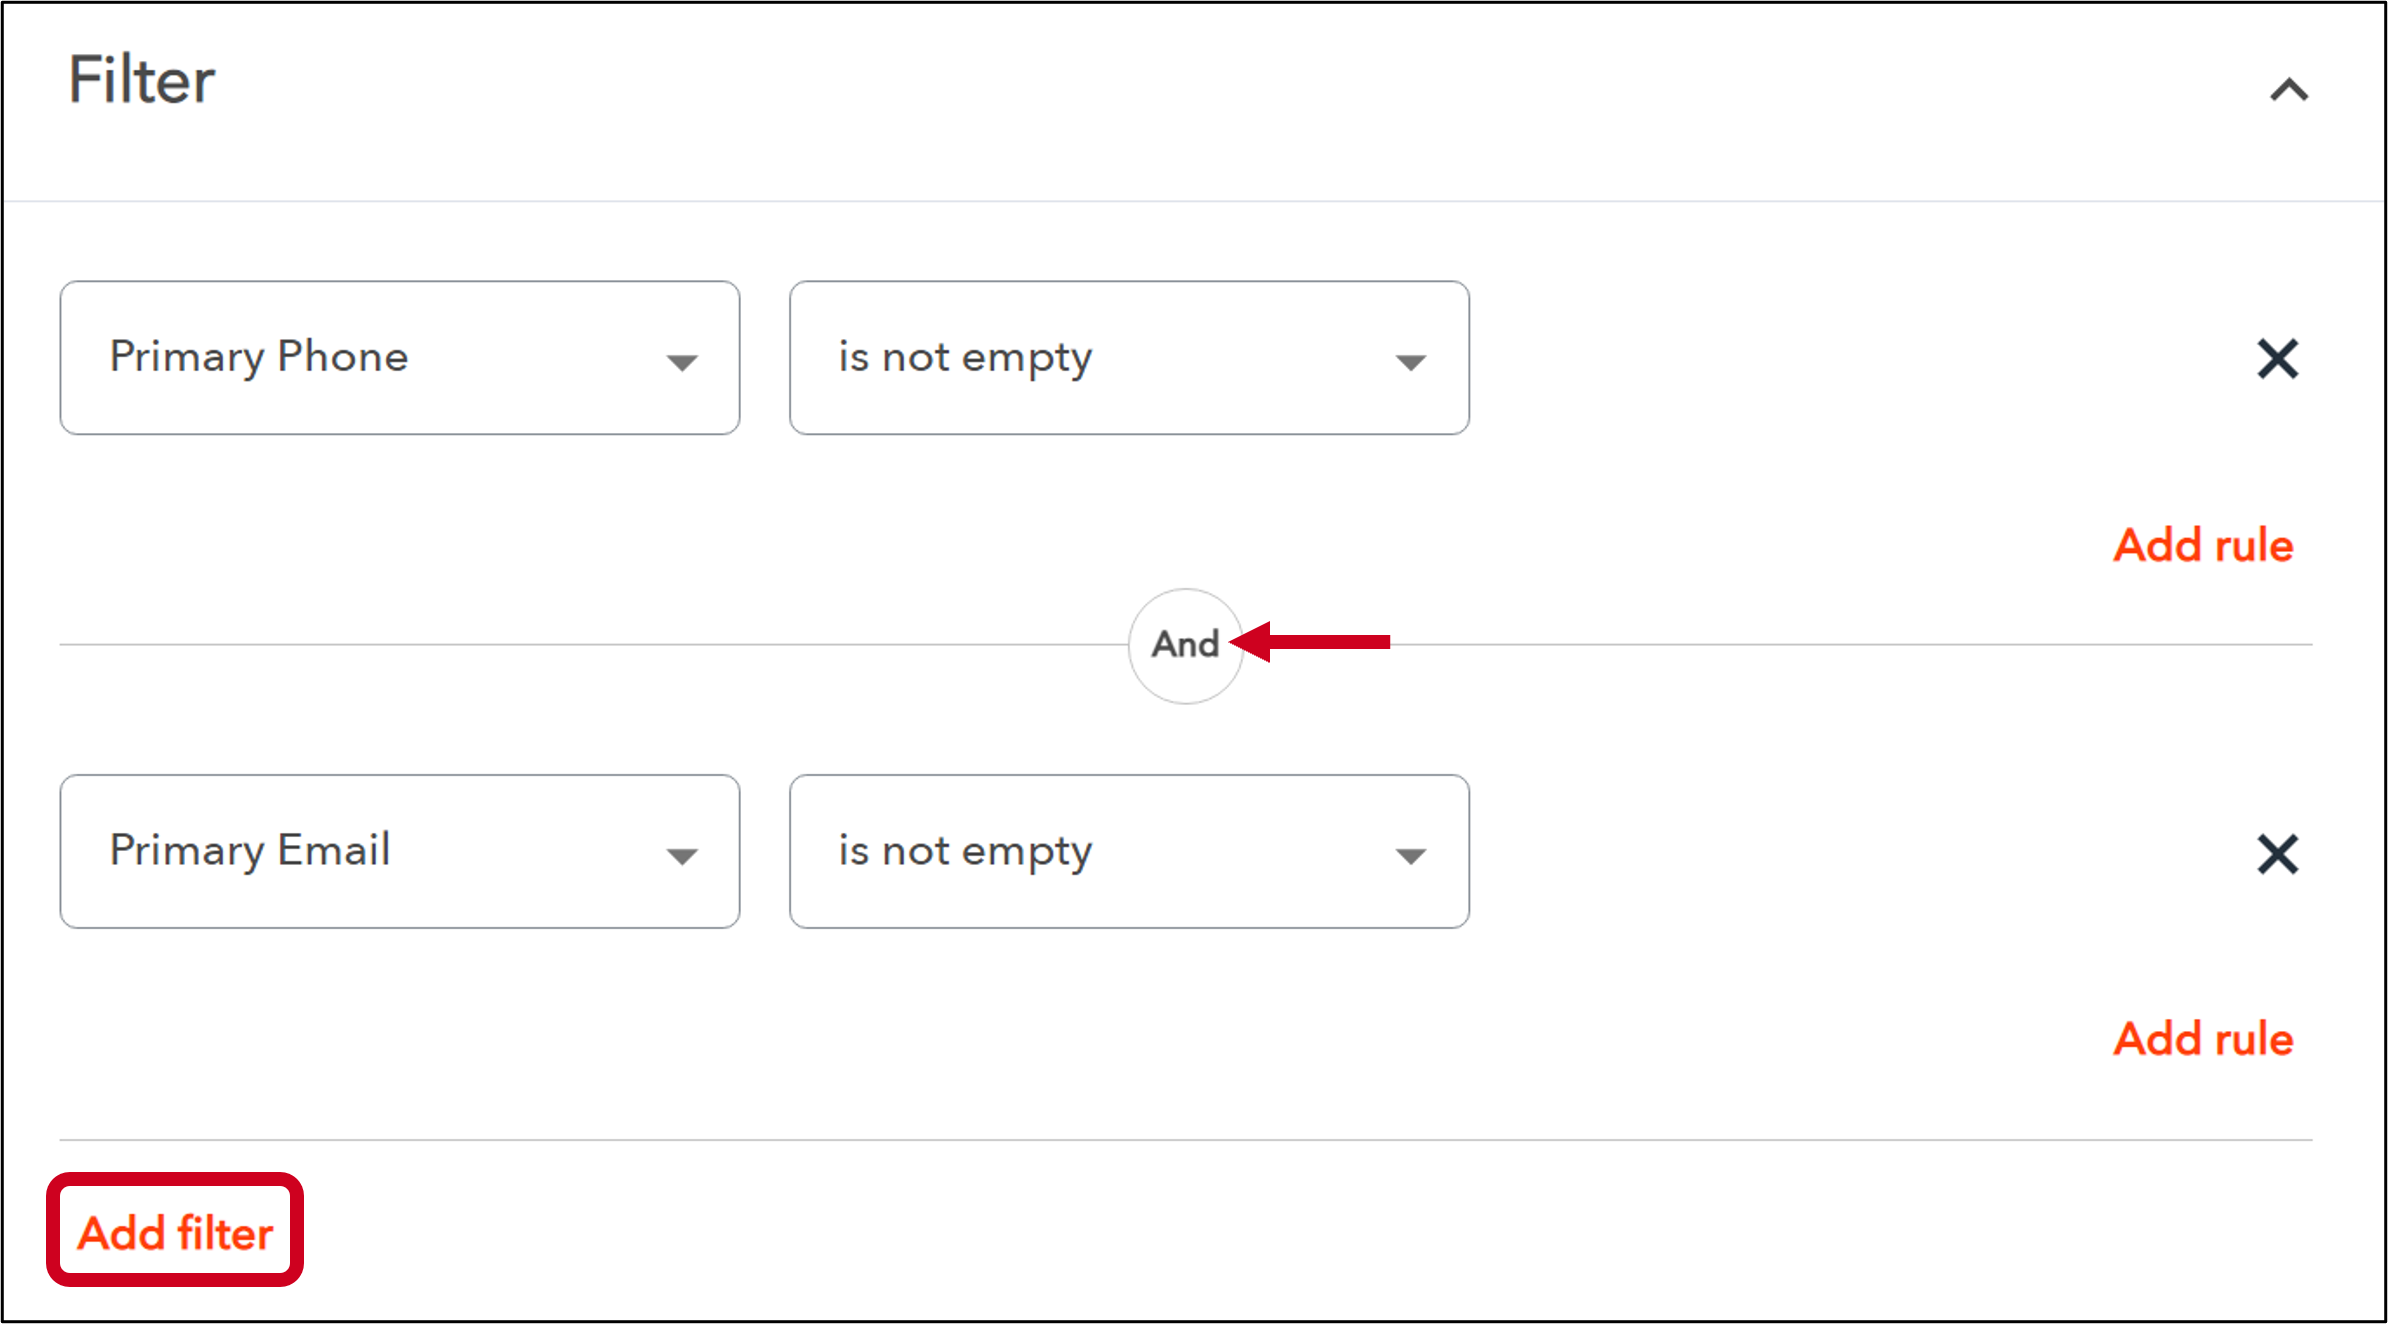
Add Filter - this creates an "and" filter. Adding an "and" filter tightens the criteria and creates a situation where contacts have to meet more than one criteria, in order to sync. In the screenshot below, the original filter limited the contacts to be synced to those that have a primary phone number. This additional "and" filter says the contact must have a primary phone number and a primary email address, in order to sync.
 |
Combining Rules and Filters - if you are going to use both rules (or) and filters (and) in the same contact sync, it is very important to be purposeful about where you add rules.
- In the GIF below, if I add the rule before the filter it will read as: The contact must have (a primary phone OR address line 1) AND a primary email address, in order to sync.
- In the GIF below, if I add the rule after the filter it will read as: The contact must have a primary phone number AND (a primary email address OR address line 1), in order to sync.
 |
3. Click Save when finished.
 |
Mapping and Custom Fields
The last thing to set up is the field mapping, between Dotloop and Command. Most of this has been done for you, but when you are able to make adjustments:
Map Fields - below the list of mapped fields, you will see a list of unmapped fields. Drag one field to another to map them together.
 |
Remove Mapping - this will cause the information from, the unmapped field, to not sync over. To remove the mapping for any field, click the minus sign, ![]() , between the two mapped fields.
, between the two mapped fields.
 |
Apply Tags (Dotloop to Command only) - there is no way to map labels to tags. That being said, you can create a custom mapping field to send over a tag to Command, when syncing from Dotloop.
- At the bottom left of the field mapping list, click Add Custom Field.
- Name the custom field. This name won't actually send over, but will help you keep track of the field name, when mapping it to Command.
- Enter the Field Value, which will be the name of the tag, as it is sent over to Command.
- Click Add Field and map it to the Tags field, in the Command column.
 |
Apply Lead Source (Dotloop to Command only) - there is no way to automatically map lead sources to Command. That being said, you can create a custom mapping field to send over a lead source to Command, when syncing from Dotloop.
- At the bottom left of the field mapping list, click Add Custom Field.
- Name the custom field. This name won't actually send over, but will help you keep track of the field name, when mapping it to Command.
- Enter the Field Value, which will be the name of the lead source, as it is sent over to Command.
- Click Add Field and map it to the Source field, in the Command column.
 |
Activate Sync
Once you are ready to start syncing contacts, scroll to the top of the page and click the Activate Sync button.
 |

