

Shop Boss — How to do a Bulk Transfer
The Shop Boss + QuickBooks integration automatically syncs your Repair Orders, Part Sale Orders, and Payments into QB as Invoices and Payments. The Bulk Transfer tool allows you to manually push batches of transactions from Shop Boss to QB.
Common Use Cases
- Importing batches of previous transactions not yet in QB.
- Recovering transactions missed during a sync outage (e.g., a Shop Boss-side delay in payment webhooks).
- Correcting or remedying previous QB entries.
Before You Begin (QBO only)
-
Income Account must be configured — Before running a Bulk Transfer, ensure your Income Account is selected in the workflow settings at my.apination.com/workflows. If it is not set, invoices will fail to create in QBO with the error
"Error upserting Item"— and without an invoice, no payment will transfer either.
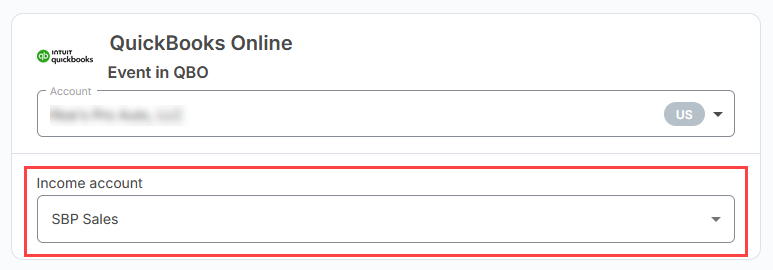
If you're unsure which Income Account to select, consult your accountant — this is a business decision API Nation cannot make for you.
Steps to Run a Bulk Transfer
Log in to Shop Boss
Navigate to your Shop Boss account and log in with your credentials.
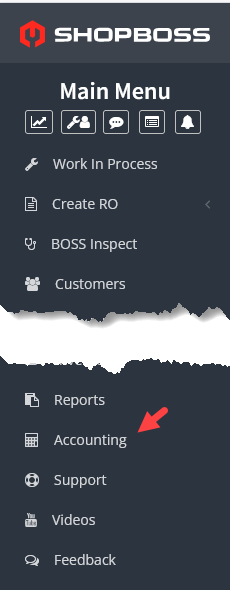
Select Accounting
Click Accounting on the left-side navigation panel.
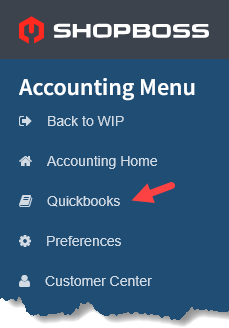
Select QuickBooks
Choose QuickBooks from the accounting menu.
Click Bulk Transfer
Click the Bulk Transfer button to begin the process.
![]()
Acknowledge the Risk Warning
After reading the on-screen message, click "I understand the risks. Proceed" to continue.
![]()
Select Transaction Type
Choose the transaction type you want to transfer: Repair Order, Part Sales, or Payments. You will need to run the tool once for each transaction type.
![]()
Select Date Range and Begin Transfer
Select the date range for the transactions you wish to transfer. When syncing multiple weeks of data, batch your syncs in increments of no more than 1 week to ensure all records transfer successfully. Once ready, click Begin Transfer.
For example, to sync all data for the month of February, run the sync 4 times using these date ranges:
| Run | Date Range |
|---|---|
| 1 | Feb 1 – Feb 7 |
| 2 | Feb 8 – Feb 14 |
| 3 | Feb 15 – Feb 21 |
| 4 | Feb 22 – Feb 28 |
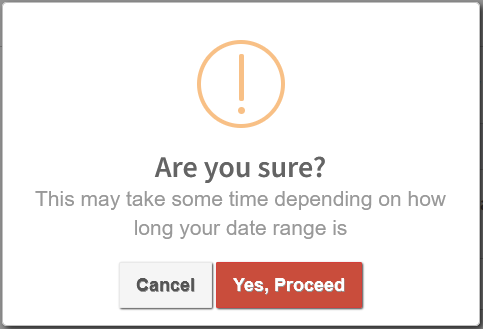
Confirm the Transfer
You will be prompted to confirm you are ready to begin. Click "Yes, proceed" to start the bulk transfer.
Still not working?
"Error upserting Item", your Income Account may not be configured in the workflow settings at my.apination.com/workflows.
