

Step 1: Preparing your QuickBooks Online (QBO) company file
A step-by-step guide to configuring your designated trust accounting QBO company file to optimize the VRAccountant workflows.
Steps
Step 1: Add a new QuickBooks Online subscription
If you haven't already subscribed to a QBO company file, please do so here.
The VRAccountant integration requires, at minimum, a QuickBooks Online Plus subscription.
Step 2: Configure your account and settings
First, let's customize a few QBO settings to optimize the VRAccountant workflow:
- Sign in to QuickBooks Online.
- From the QuickBooks homepage, select the Gear icon and choose Account and settings.
- On the Sales tab, in the Sales form content section, ensure the following toggles are turned on, then click Save.
Custom transaction numbers

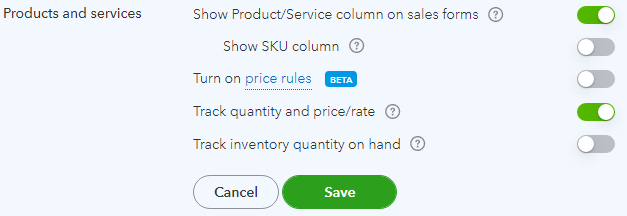
- On the Sales tab, in the Products and services section, ensure the following toggles are turned on, then click Save.
Show Product/Service column on sales forms
Track quantity and price/rate
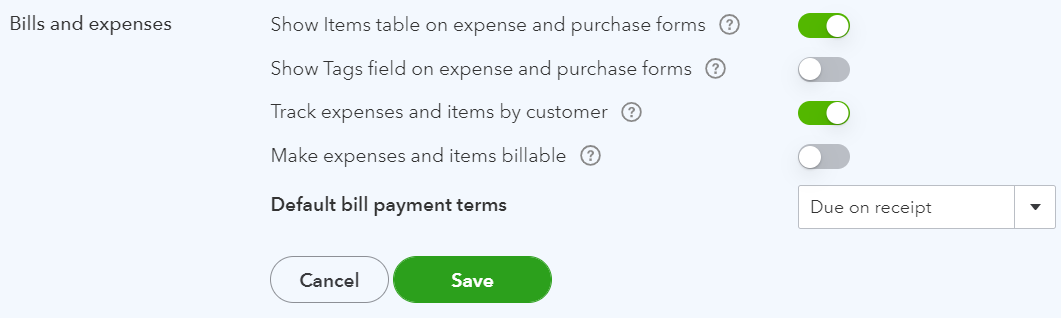
- On the Expenses tab, in the Bills and expenses section, ensure the following toggles are turned on, then click Save.
Show Items table on expense and purchase forms
Track expenses and items by customer
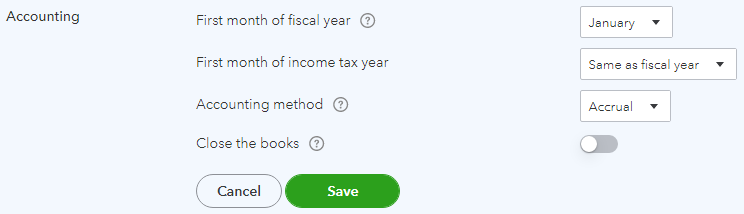
- On the Advanced tab, in the Accounting section, confirm the Accounting method is set to Accrual, then click Save.
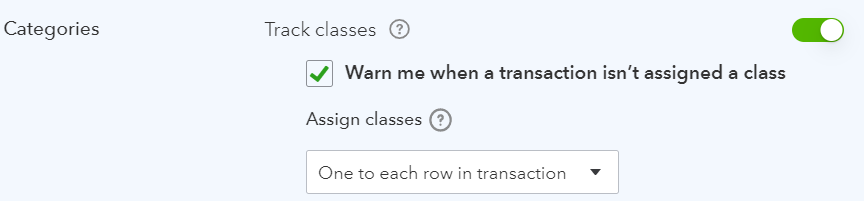
- On the Advanced tab, in the Categories section, configure Classes as shown below, then click Save.
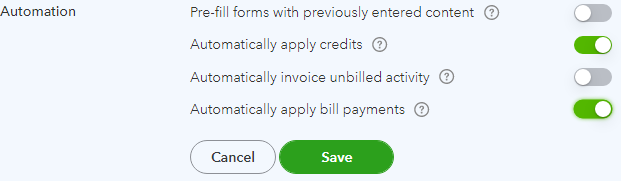
- On the Advanced tab, configure the Automation section as shown below, then click Save.
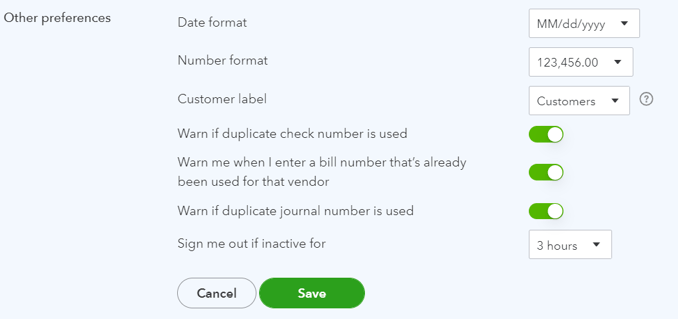
- On the Advanced tab, in the Other preferences section, ensure the following toggles are turned on, then click Save.
Warn if duplicate bill number is used
Warn if duplicate journal number is used
Select Done.
Step 3: Set up your chart of accounts
Download our free, ready-to-import Sample Chart of Accounts for Trust Accounting to kickstart yours.
- Prepare your spreadsheet for import
- Open the link above, then navigate to File>Download>Comma-separated values (.csv).
- Save the file to your drive.
- Upload your spreadsheet
- Sign in to QuickBooks Online.
- Select Settings ⚙. Then select Import Data.
- Select Chart of Accounts.
- To upload a file from your computer, select Browse and choose the file. Then select Open.
- Select Next.
-
Map your spreadsheet fields to QuickBooks fields
Once you upload your spreadsheet, map your accounts so they import correctly.
- In the Your Field column, select the small arrow ▼ icon and match the names to the QuickBooks Online field for:
- Detail Type
- Account Name
- Account number
- Type
- With the exception of Account Name, you can select No Match if there's a field that doesn’t have a matching column in your spreadsheet. For example, if you don’t use account numbers.
- Select Next.
- In the Your Field column, select the small arrow ▼ icon and match the names to the QuickBooks Online field for:
-
Import your chart of accounts
You’re almost finished. Check everything one last time before you import your accounts.
- If you haven’t yet, be sure to add types and detail types.
Tip: Focus on getting the account types right first. Then select the detail types that fit the transactions you want to track. - If you see a field highlighted in red, hover over the highlighted field to see what you need to fix.
- Uncheck any account you don’t want to save.
- If everything looks good, select Import.
- If you haven’t yet, be sure to add types and detail types.
Step 4: Set up your products & services
Download our free, ready-to-import Sample Products and Services for Trust Accounting to kickstart yours.
- Prepare your spreadsheet for import
- Open the link above, then navigate to File>Download>Comma-separated values (.csv).
- Save the file to your drive.
- Sign in to QuickBooks Online.
- Select Settings ⚙. Then select Import Data.
- Select Products and Services.
- Select Browse to upload the file from your computer. Choose the file, and then select Open.
- Select Next.
- Map your information. Your Field represents the headers on your spreadsheet. From each drop-down ▼ menu, select the one that matches a field in QuickBooks Online.
- Select Next.
- If you see some cells highlighted in red, this means the cell is invalid. Check the cell in your spreadsheet and try importing again.
- Select Overwrite all values for each product or service with the same name. Make sure everything looks correct because this can't be undone.
- Select Import.
For more info on how VRAccountant uses QBO products & services to automate the trust accounting workflow, see this article.
Step 5: Set up your classes
VRAccountant uses "classes" in QBO to tag the transactions it creates. Here, you'll be adding:
- one class for your property management business (ex: Property Management Co.)
- one class for your owners (ex: Owners); this will also serve as a default during your VRAccountant workflow configuration.
- one sub-class for each listing in your property management system, which should roll up to the Owners class created above.
During the VRAccountant configuration, you'll map each listing in your PMS to the corresponding class you've created here.
To add a new class:
- Go to Settings ⚙ and then All Lists.
- Select Classes.
- Select New. Give this class a name.
- To add a sub-class, select Is a sub-class and select the main class. You can nest up to five classes.
- Select Save.
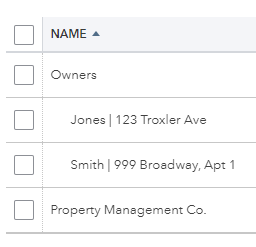
Example suggested class hierarchy:
A subscription to QuickBooks Online Plus or QuickBooks Online Advanced is required for class tracking. Plus subscribers are limited to 40 classes.
If you have more than 40 listings, you may need to upgrade to Advanced to take full advantage of the VRAccountant automation. If you need to upgrade your plan, click here.
Only admins in can create classes.
For more information on managing classes in QBO, click here.
Step 6: Set up your vendors
From the perspective of the trust account, your business is a vendor, in the sense that you're providing services to your owners and will be paid for those services from the trust account.
First, add your business as a vendor.
To add a vendor manually:
- Select Expenses, then Vendors.
- Select New Vendor.
- Complete the fields in the Vendor Information window.
- Select Save and close.
From the perspective of the trust account, your owners are vendors, in the sense that you'll be paying them out their share of income from the trust account.
Second, create a vendor record for each owner following the steps above.
Alternatively, consider importing your owners as vendors from a spreadsheet.
- Download a sample vendor import file for QBO.
- Open the link above, then navigate to File>Download>Comma-separated values (.csv).
- Save the file to your drive.
- Sign in to QuickBooks Online.
- Select Settings ⚙. Then select Import Data.
- Select Vendors.
- Select Browse to upload the file from your computer. Choose the file, and then select Open.
- Select Next.
- Map your information. Your Field represents the headers on your spreadsheet. From each drop-down ▼ menu, select the one that matches a field in QuickBooks Online.
- Select Next.
- If you see some cells highlighted in red, this means the cell is invalid. Check the cell in your spreadsheet and try importing again.
- Select Import.
For help troubleshooting your vendor file import, click here.
Step 7: Set up your customer types
VRAccountant uses "customer types" in QBO to tag the customer records it creates. Here, you'll be adding one customer type for each channel you accept reservations through.
During the VRAccountant configuration, you'll map each customer type you've created here to the corresponding channel in your PMS.
If you haven't already added at least one customer record, you'll need to add your first one before setting up a new customer type:
- Go to Sales.
- Select the Customers tab.
- Select Add customer manually.
- Enter the customer's info.
- Select Save.
To add a new customer type:
- Go to Sales.
- Select the Customers tab.
- Select Customer types.
- Select New customer type.
- Enter the name of the channel you're creating the customer type for. For example, Airbnb.
- Select Save.
- Repeat for each channel you accept reservations through.
Don't forget to add a customer type to represent your direct bookings (ex: bookings made through your website).
Step 8: Set up your custom fields (optional)
VRAccountant leverages QBO's custom fields to tag invoices with the Booking Date, Check-in Date, and Check-out Date of reservations per your PMS. To add custom fields:
- Select the Gear icon in the upper righthand corner of your QuickBooks screen; select Custom fields.
- On the following page, click Add custom field.
- Add a custom field named Booking Date by completing the form as shown below; click Save.
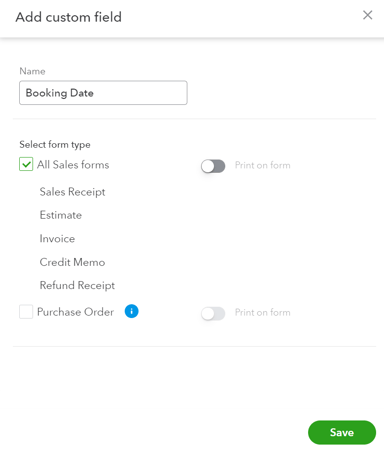
- Add two (2) additional custom fields, one named Check-in Date and another named Check-out Date.
The names of the custom fields must be entered exactly as shown below to function properly:
Booking Date
Check-in Date
Check-out Date
You can proceed to step 2 here.

