

Now that our integration is in place, we'll review how information from Lone Wolf Workspace is sent to QuickBooks Online, in this example we'll take a look at how 'Sales Receipts' and Checks' will be created in QuickBooks Online from Lone Wolf Workspace.
(NOTE: If you are using Deposits - you should reference this part of our guide via this link)
1.) To get started, lets take a look at how we've configured our integration to create and map Sales Receipts, this can be viewed in the screenshot below:
Sales Receipt Configuration/Mapping Example

Check Configuration/Mapping Example

2.) Before we start syncing, it's important to note that the easiest way to reference which data will land in QBO is by viewing the 'Funding Confirmation' that is generated within Lone Wolf Workspace, so for this transaction, which is a Table Funded Transaction - the 'Funding Confirmation' looks like below:
Funding Confirmation Example For Transaction That Creates Checks and Sales Receipts

3.) Now that we've seen how our Sales Receipts and Checks are setup to map to QuickBooks Online, we can take a look at an example transaction in Lone Wolf Workspace:
- Once have reached the funding stage of the Transaction review - the data will sync automatically when:
1. Funds to the broker have been received is checked.
2. You select 'Next’.
3. OR you do have the option to sync earlier by clicking 'Sync to QBO' option in the review screen.

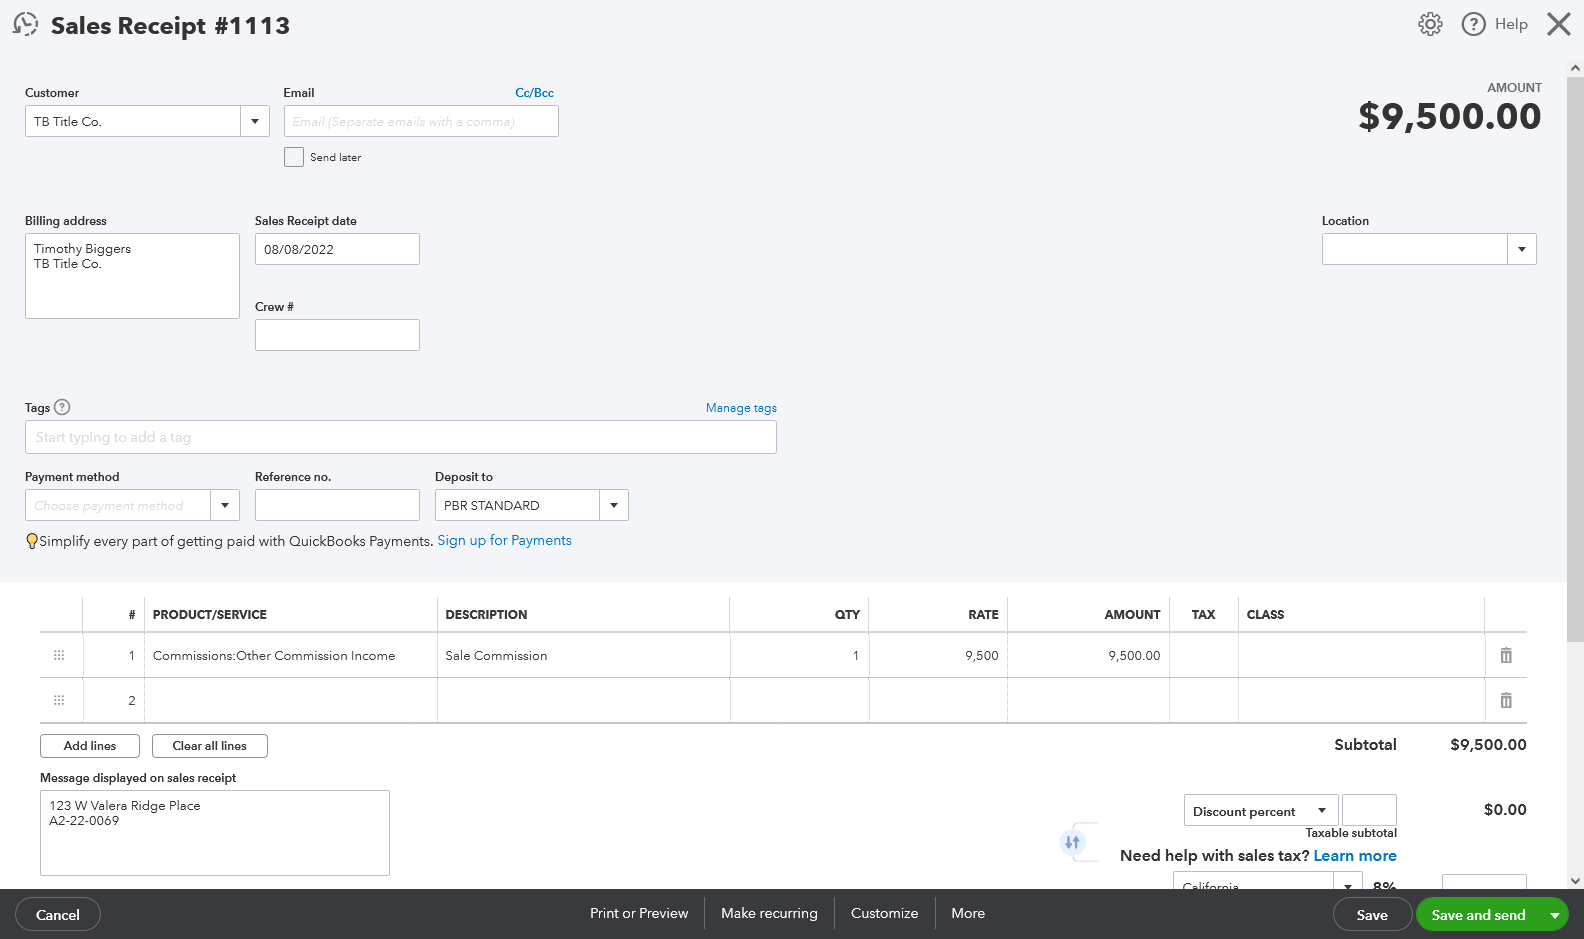
4.) At this point, information should be sent to QuickBooks Online within about 20-30 seconds of clicking this button. You will also see the sync noted in your Transaction History tab. For this transaction, we'll generate two Sales Receipts and a single check, lets see how they look below:
Example Data For Transaction That Creates Checks and Sales Receipts Within QuickBooks Online
First Sales Receipt Example
Second Sales Receipt Example

Check Example

5.) As a quick little bonus, we can view the 'Customer' that we used on our Sales Receipt, as well as the 'Vendor' we used on our Check below:
Customer Example (Used On Sales Receipt)

Vendor Example (Used on Check)

And this is how this type of configuration would reflect in QuickBooks Online based on the transaction that was sent from Lone Wolf Workspace!
(NOTE: If you are using Deposits - you should reference this part of our guide via this link)
In our next section, we will just cover some basic tips and tricks for for navigating QuickBooks Online to find the information that is being created.
Proceed to the next step here.

