

General Setup for Propertybase Back Office integration into QuickBooks Online
This is a tutorial on how to setup the Propertybase Back Office to QuickBooks Online Integration
Let's get started:
Section A.) Connecting QuickBooks Online to API Nation
1.) First, you will want to contact the Propertybase Back Office support team to assist in getting the process started: [email protected]
2.) From here, you will want to click on 'Add Integration':

3.) Once you've clicked this button you should see a new message reading 'Account integration successful!', next we are going to click on 'Manage Workflow':

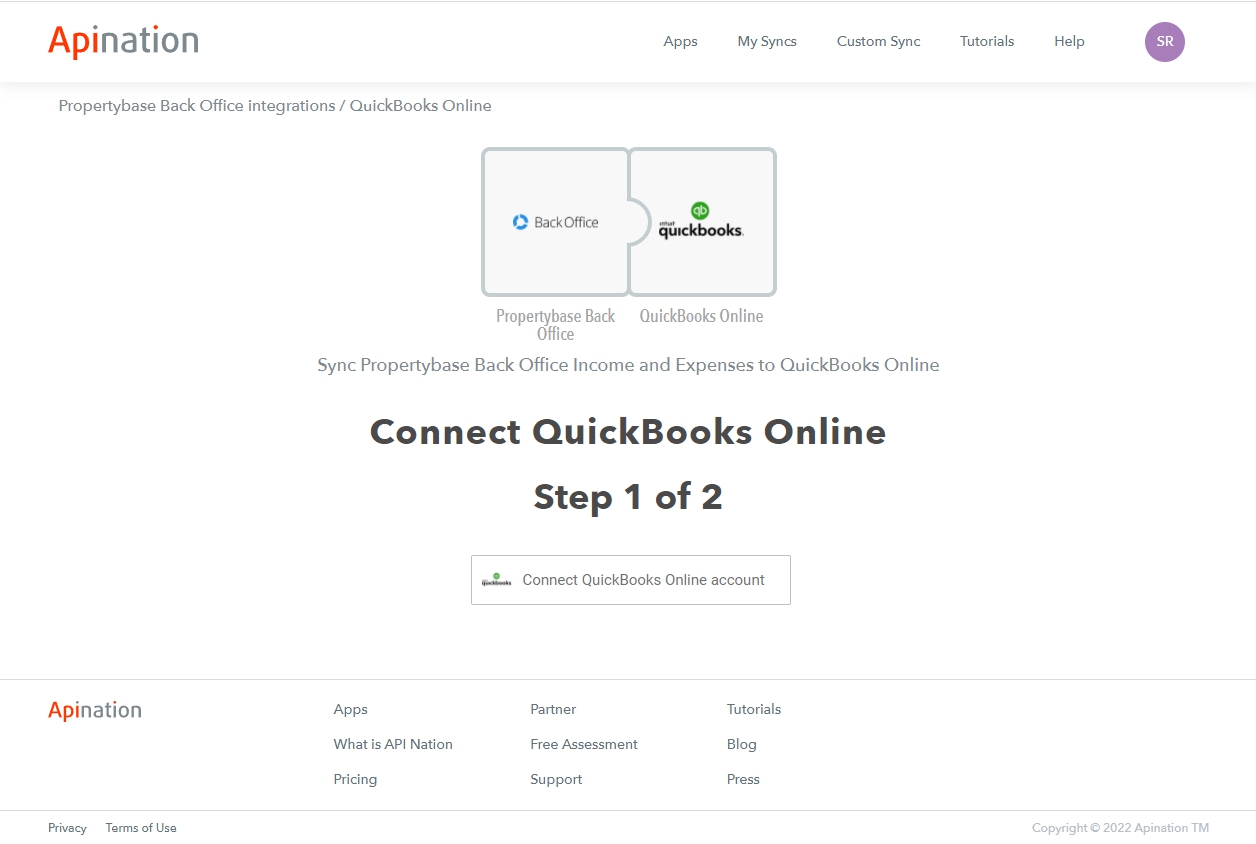
4.) From here, we will be redirected to a new page where we will need to click on 'Connect QuickBooks Online':
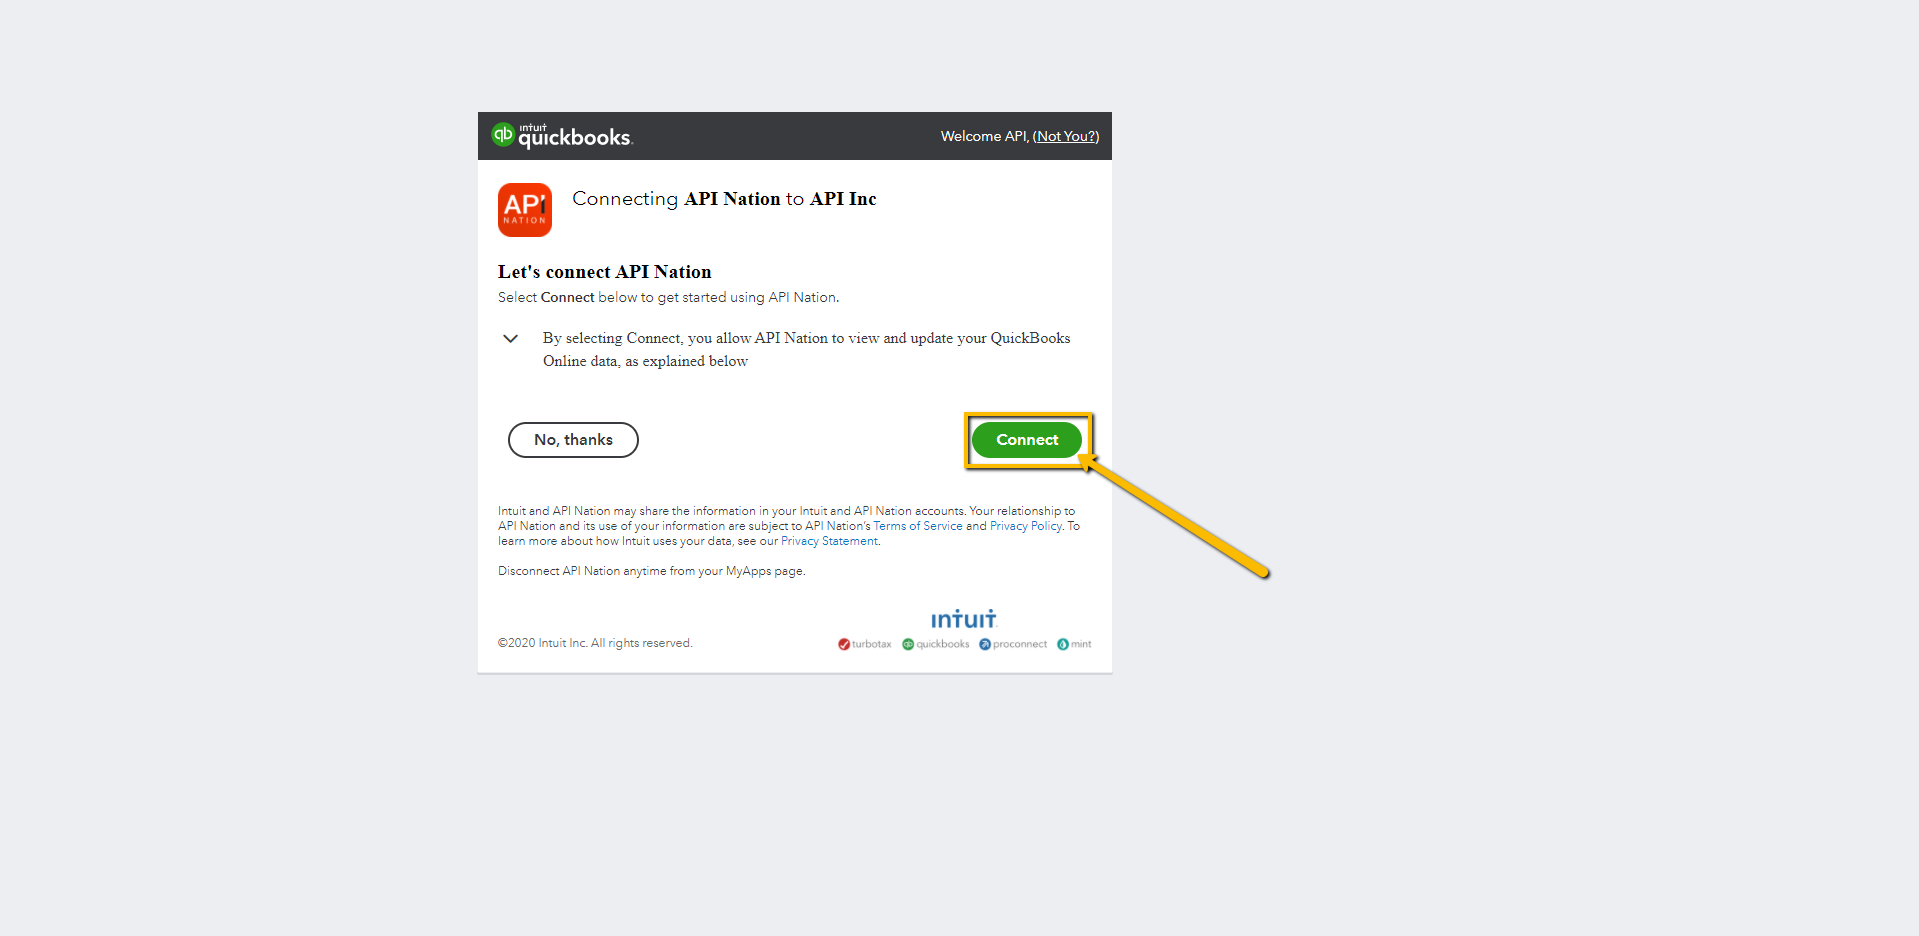
5.) After entering the proper credentials, you'll want to allow API Nation to access your QuickBooks Online account:
Once this has been done, we should have QuickBooks Online connected to API Nation, in the next section we will review the settings for your integration!
Section B.) Configuring the settings for your Integration
In this section, we'll break things out into separate sections for each part of the page on the screen, we will start with the 'Income Section'.
1.) Income
Below, we have have a photo of the income section, there are five options that will need to be selected; below the image we will breakdown what each one means:
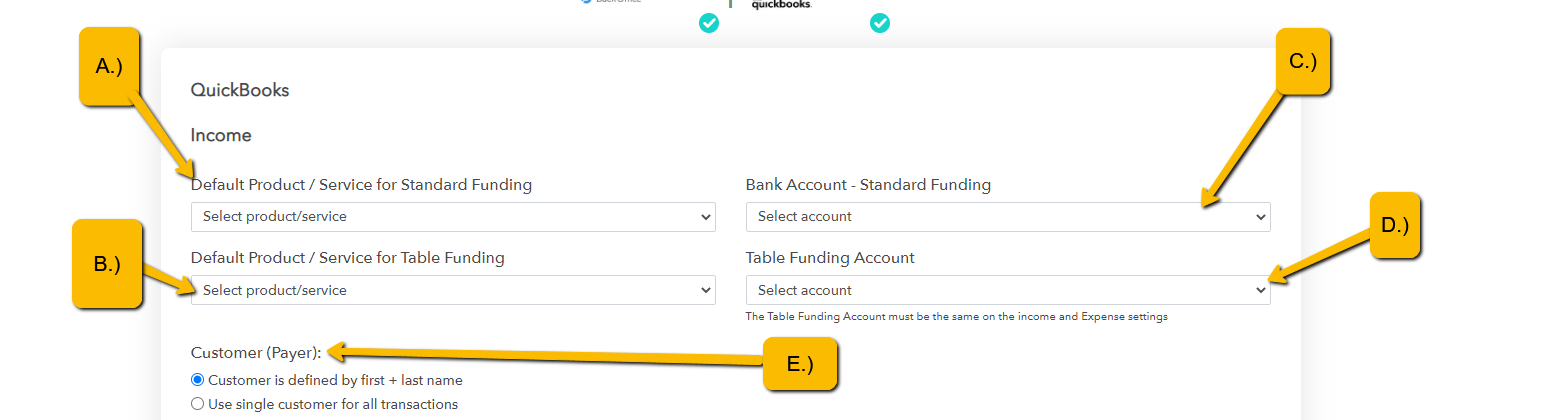
A.) Default Product / Service for Standard Funding
-
This field allows the user to select a default Product/Service that should be used for line items in Standard Funded transactions. This means that if the Memo Text from Propertybase Back Office does not match an existing Product/Service in QuickBooks Online, the default will be used.
B.) Default Product / Service for Table Funding
-
This field allows the user to select a default Product/Service that should be used for line items in Table Funded transactions. This means that if the Memo Text from Propertybase Back Office does not match an existing Product/Service in QuickBooks Online, the default will be used.
C.) Bank Account - Standard Funding
-
This field allows the user to select the Bank Account for Sales Receipts in QuickBooks Online in Standard Funded transactions.
D.) Table Funding Account
-
This field allows the user to select the Bank Account for Sales Receipts in QuickBooks Online in Table Funded transactions. Please note that this field will also be the same for the Table Funding Account for expenses.
E.) Customer (Payer)
-
This field allows the user to select either one Customer for all transactions, or to allow the sync to find/create Customers from the data in Propertybase Back Office.
2.) Expense
Below, we have have a photo of the expense section, there are five options that will need to be selected; below the image we will breakdown what each one means:
Note: Currently our integration will only create checks on the expense side and the 'Expense' Table Funding account must currently be be the same as the 'Income' Table Funding account, so these will not be covered.
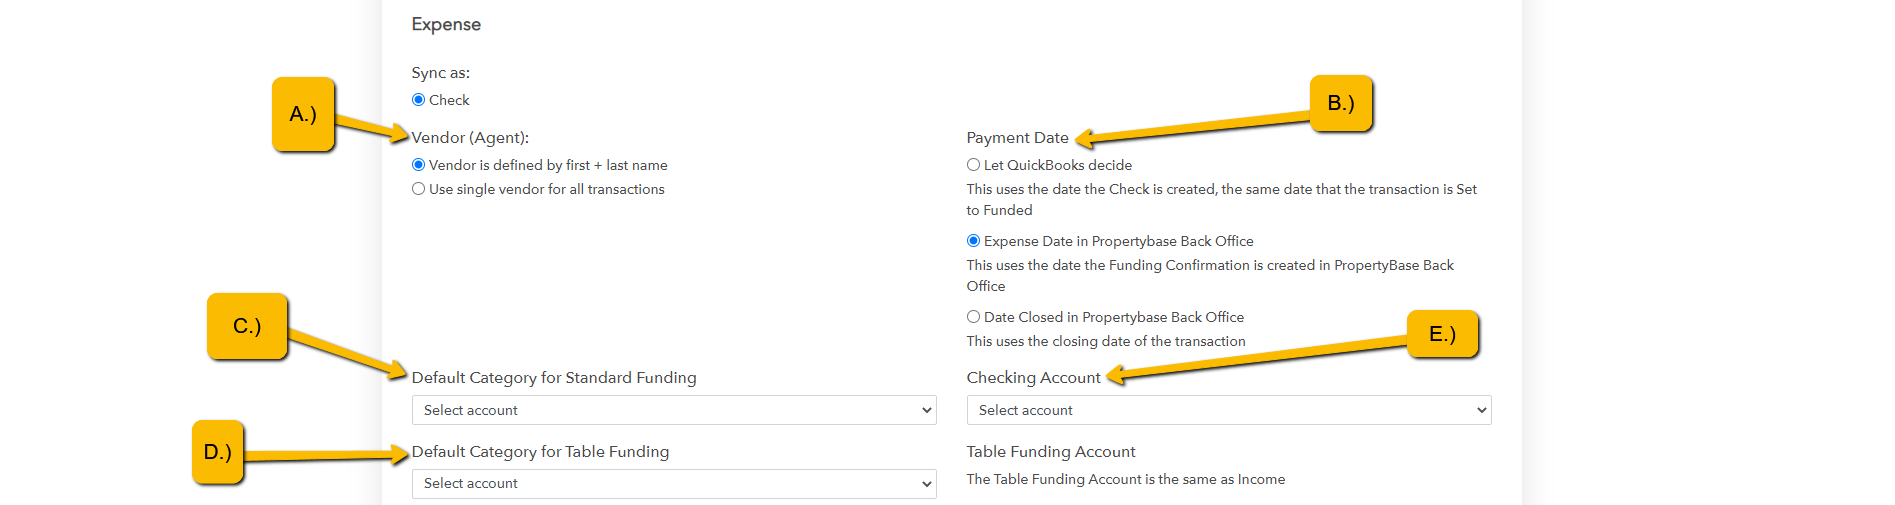
A.) Vendor (Agent)
-
This field allows the user to select either one Vendor for all transactions, or to allow the sync to find/create Vendors from the data in Propertybase Back Office.
B.) Payment Date
-
'Let QuickBooks Decide' - This uses the date the Check is created, the same date that the transaction is Set to Funded
-
'Expense Date in Propertybase Back Office' - This uses the date the Funding Confirmation is created in Propertybase Back Office
-
'Date Closed in Propertybase Back Office' - This uses the closing date of the transaction
C.) Default Category for Standard Funding
-
This field allows the user to select a default Category that should be used for line items in Standard Funded transactions. This means that if the Memo Text from Propertybase Back Office does not match an existing Category in QuickBooks Online, the default will be used.
D.) Default Category for Table Funding
-
This field allows the user to select a default Category that should be used for line items in Table Funded transactions. This means that if the Memo Text from Propertybase Back Office does not match an existing Category in QuickBooks Online, the default will be used.
E.) Checking Account
-
This field allows the user to select the Bank Account for Checks in QuickBooks Online in Standard Funded transactions.
3.) General
Below, we have have a photo of the general section, there are three options that will need to be selected; below the image we will breakdown what each one means:

A.) Memo
-
This field allows the user to set the memo line on the Checks that are created in QuickBooks Online. The “Use Propertybase Back Office Notes” option will use the property address of the listing as the memo line.
B.) Class
-
This field allows the user to select a Class in QuickBooks Online to associate with their Checks.
C.) Location
-
This field allows the user to select a Location in QuickBooks Online to associate with their Checks.
Section C.) How information is sent from Propertybase Back Office to QuickBooks Online
Now that our integration is in place, we'll review how information from Propertybase Back Office is sent to QuickBooks Online.
1.) In this example, we're going to navigate to a test transaction that we have in Back Office, we'll do this by logging into our Propertybase Back Office Account here: https://demo.backagent.net/
2.) Once we're in, we'll want to navigate to the 'Transactions' Page:

3.) From here, we'll select an active transaction that is ready to be closed, in this example we will be using '2787 Revere Main Nw, Kennesaw, GA':

4.) Once we're within the transaction, we will want to review it by clicking 'Review Transaction':

5.) Now we are at the part that will send this information to QuickBooks Online, when you click on 'Set To Funded', this is what sends the checks and sales receipts over to QuickBooks Online.
(NOTE: If you ever need to edit your transaction, you can always re-open it and click 'Set To Funded' and it will update QuickBooks Online with new information)


